1.
Remove the front wheel & tire.
Tightening torque :
88.3 ~ 107.9N.m (9.0 ~ 11.0kgf.m, 65.1 ~ 79.6lb-ft)
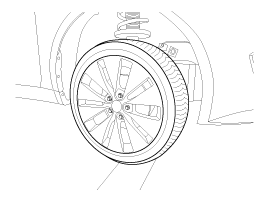
caution
Be careful not to damage to the hub bolts when removing the front wheel & tire.
Remove the front wheel & tire.
Tightening torque :
88.3 ~ 107.9N.m (9.0 ~ 11.0kgf.m, 65.1 ~ 79.6lb-ft)
Be careful not to damage to the hub bolts when removing the front wheel & tire.
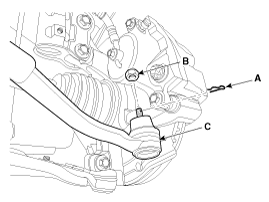
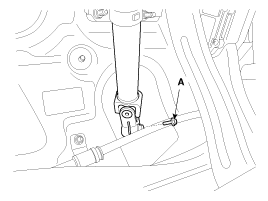
Disconnect the stabilizer link (B) from the front strut assembly (A) after loosening the nut.
Tightening torque :
98.1 ~ 117.7N.m (10.0 ~ 12.0kgf.m, 72.3 ~ 86.8lb-ft)

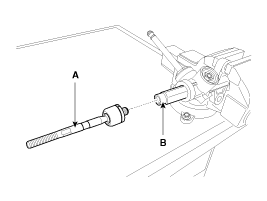
Remove the tie rod end ball joint (C) from the knuckle by using the SST (09568-34000).
Remove the split pin (A).
Remove the castle nut (B).
Use the SST (09568-34000).
Tightening torque:
34.3 ~ 44.1N.m (3.5 ~ 4.5kgf.m, 25.3 ~ 32.5lb-ft)
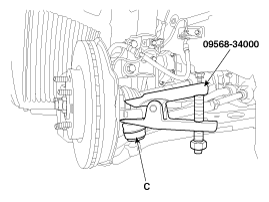
When using SST, be sure not to damage the dust cover of lower arm ball joint.
Keep SST tied to the car because there is a risk of injury by dropping the SST during removing the lower arm ball joint.
The peripheral parts may be damaged when removing the lower arm ball joint with a general tool such as lever, so be sure to use SST.
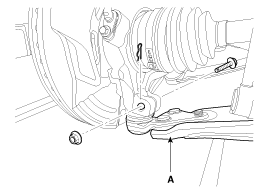
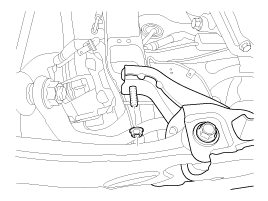
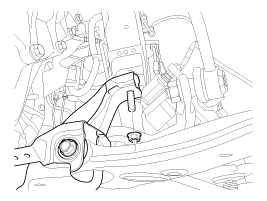
Loosen the bolt & nut and then remove the lower arm (A).
Tightening torque :
98.1 ~ 117.7N.m (10.0 ~ 12.0kgf.m, 72.3 ~ 86.8lb-ft)
Loosen the bolt (A) and then disconnect the universal joint assembly from the pinion of the steering gear box.
Tightening torque :
29.4 ~ 34.3N.m (3.0 ~ 3.5kgf.m, 21.7 ~ 25.7lb-ft)
Keep the neutral-range to prevent the damage of the clock spring inner cable when you handle the steering wheel.
Do not use the bolt again.
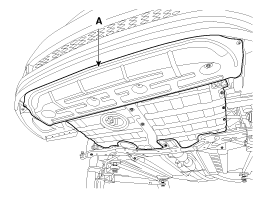
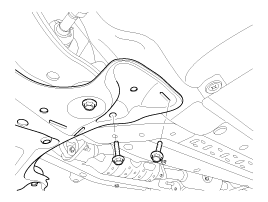
Remove the under cover (A).
Loosen the bolt (A) & nut (B) and then remove the roll rod stopper.
Tightening torque :
107.9 ~ 127.5N.m (11.0 ~ 13.0kgf.m, 79.6 ~ 94.0lb-ft)
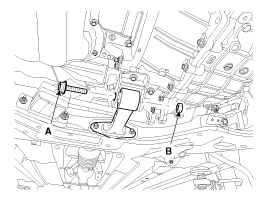
Disconnect the muffler rubber hanger (A).
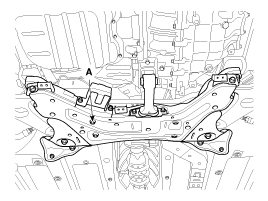
Loosen the bolts & nuts and then remove the sub frame (A).
Tightening torque
Sub frame mounting bolts & nuts:
156.9 ~ 176.5N.m (16.0 ~ 18.0kgf.m, 115.7 ~ 130.2lb-ft)
Sub frame stay bolts & nuts:
44.1 ~ 58.8N.m (4.5 ~ 6.0kgf.m, 32.5 ~ 43.4lb-ft)
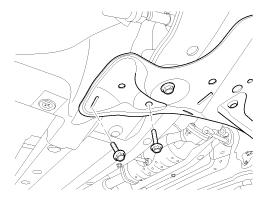
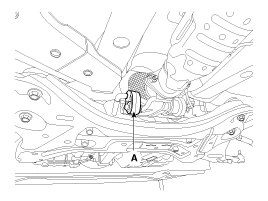
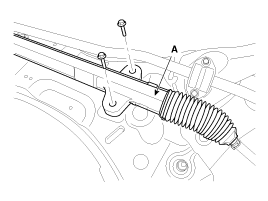
Loosen the bolt and then remove the steering gear box (A).
Tightening torque :
88.3 ~ 107.9N.m (9.0 ~ 11.0kgf.m, 65.1 ~ 79.6lb-ft)
Installation is the reverse of the removal.
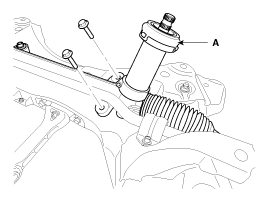
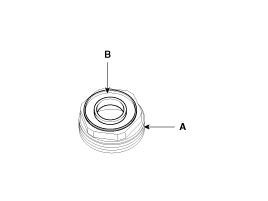
Remove the dust packing & cap (A) from the pinion housing.
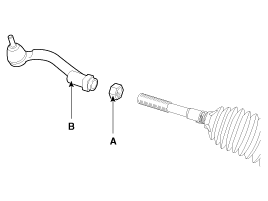
Loosen the lock nut and then remove the tie rod end (B) and lock nut (A) from the tie rod.
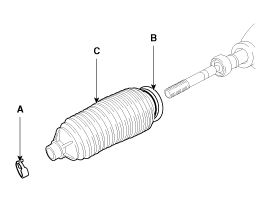
Remove the bellows clip (A) and band (B) and then pull the bellows (C) away from the end of the tie rod.
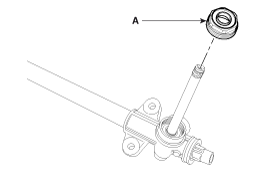
Remove the tie rod (B) from the rack bar (A) by unscrewing the tie rod inner ball joint.
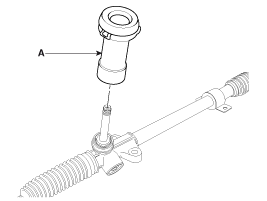
Remove the plug (A) from the pinion housing.
Remove the oil seal (B) from the plug (A).
Remove the yoke plug (A) and spring (B) and then pull out the support yoke (C).
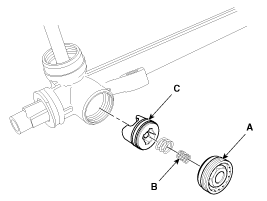
Remove the O-ring (B) from the support yoke assembly (A).

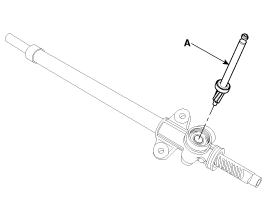
Pull the pinion assembly (A) out of the pinion housing.
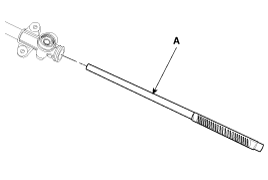
Pull the rack bar (A) out of the rack housing.
Reassembly is the reverse of the disassembly.
Rack bar
Check the rack gear for damage.
Check the rack bar for bend and deformation.
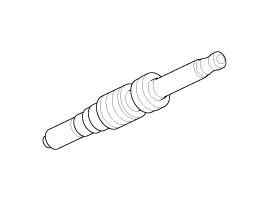
Pinion assembly
Check the pinion gear for damage
Check the oil seal for damage.
Check the inside of rack housing for damage.
Check the bellows for being torn.
