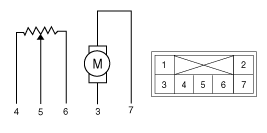
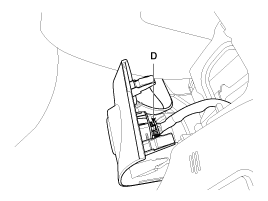
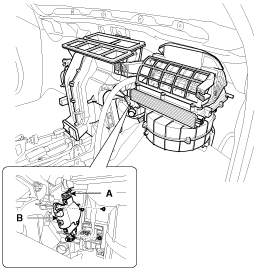
Ignition "OFF"
Disconnect the connector of temperature control actuator.
Verify that the temperature control actuator operates to the hot position when connecting 12V to the terminal 3 and grounding terminal 7.
Verify that the temperature control actuator operates to the cool position when connecting in the reverse.
1. - 2. - 3. Cool position 4. Sensor ground | 5. Feedback signal 6. 5V (Vcc) 7. Hot position |
Check the voltage between terminals 4 and 5 (Drive).
Door position | Voltage(4-5) | Error detecting |
Max. cooling | 0.3 ± 0.15V | Low voltage :0.1V or less |
Max. heating | 4.7 ± 0.15V | High voltage :4.9V or more |
1. - 2. - 3. Cool position 4. Sensor ground | 5. Feedback signal 6. 5V (Vcc) 7. Hot position |
Check the voltage between terminals 4 and 5 (Passenger).
Door position | Voltage(4-5) | Error detecting |
Max. cooling | 0.3 ± 0.15V | Low voltage :0.1V or less |
Max. heating | 4.7 ± 0.15V | High voltage :4.9V or more |
It will feedback current position of actuator to controls.
If the measured voltage is not specification, substitute with a known-good temperature control actuator and check for proper operation.
If the problem is corrected, replace the temperature control actuator.
Disconnect the negative (-) battery terminal.
Using the screwdriver, remove the side cover (A).
Loosen the mounting screws and then remove the crash pad lower cover (A)
Disconnect the crash pad lower switch connectors (A).
Disconnect the diagnosis connector (B) and crash pad under lamp connector (C).
Disconnect the start/stop button connector (D).
Remove the shower duct (A).
Loosen the mounting bolts and then remove the BCM.
(Refer to BE group - “BCM”)
Disconnect the temperature control actuator connector (A)
Loosen the mounting screw and then remove the temperature control actuator (B).
Using the screw driver, remove the side cover (A).
Remove the main crash pad lower cover (A).
Disconnect the damper (B) and glove box lift (C) from the glove box (A).
Disconnect the pin (A) and then remove the glove box (B).
Loosen the mounting screw and bolts and than remove the glove box housing (A).
Disconnect the glove box lamp connector (A).
Disconnect the glove box lamp switch connector (B) and glove box hose (C).
Remove the shower duct (A).
. Disconnect the temperature control actuator connector (A).
Loosen the mounting screw and then remove the temperature control actuator (B).
Installation is the reverse order of removal.