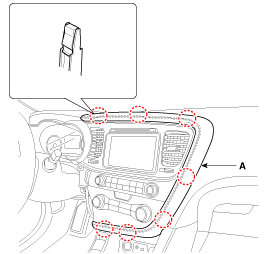
Using a screwdriver or remover, remove the crash pad side cover (A).
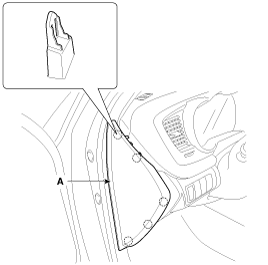
When prying with a flat-tip screwdriver, wrap it with protective tape, and apply protective tape around the related parts, to prevent damage.
Use a plastic panel removal tool to remove interior trim pieces to protect from marring the surface.
Take care not to bend or scratch the trim and panels.
Put on gloves to protect your hands.
Using a screwdriver or remover, remove the crash pad side cover (A).

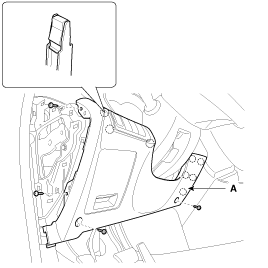
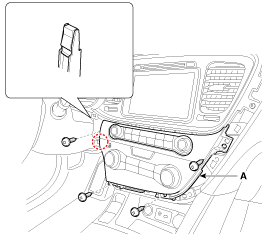
After loosening the mounting screws, then remove the crash pad lower panel (A).
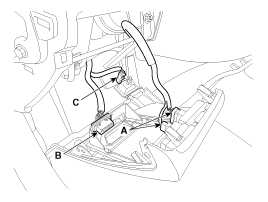
Disconnect the crash pad lower switch connectors (A).
Disconnect the diagnosis connector (B) and crash pad under lamp connector (C).
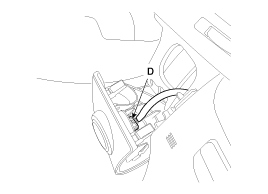
Disconnect the start/stop button connector (D).
Using a screwdriver or remover, remove the crash pad garnish [RH] (A).
After loosening the mounting screws, then remove the heater control unit panel (A).
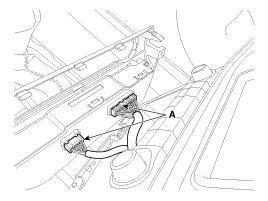
Disconnect the A/C & heater controller unit connectors (A).
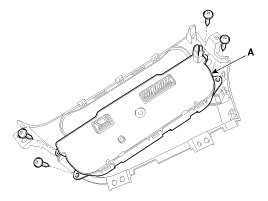
After loosening the mounting screws, then remove the heater control unit (A).
Installation is the reverse of removal.
Make sure the connector is plugged in properly.
Replace any damaged clips.