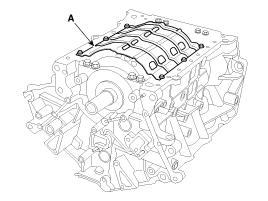
Remove the baffle plate (A).

Use fender covers to avoid damaging painted surfaces.
To avoid damage, unplug the wiring connectors carefully while holding the connector portion.
Mark all wiring and hoses to avoid misconnection.
Inspect the timing chain before removing the cylinder head.
Turn the crankshaft pulley so that the No.1 piston is at top dead center (TDC).
Remove the engine assembly from the vehicle.
(Refer to Engine And Transmission Assembly - "Engine And Transmission Assembly")
Remove the drive plate and adapter plate.
(Refer to Cylinder Block - "Drive Plate")
Attach the engine to engine stand for disassembly.
Remove the exhaust manifold.
(Refer to Intake And Exhaust System - "Exhaust Manifold")
Remove the intake manifold.
(Refer to Intake And Exhaust System - "Intake Manifold")
Remove the timing chain.
(Refer to Timing System - "Timing Chain")
Remove the water temperature control assembly.
(Refer to Cooling System - "Water Temperature Control Aassembly")
Remove the cylinder head.
(Refer to Cylinder Head Assembly - "Cylinder Head")
Remove the oil pump.
(Refer to Lubrication System - "Oil Pump")
Remove the oil filter body.
(Refer to Lubrication System - "Oil filter body")
Remove the upper oil pan.
(Refer to Lubrication System - "Oil Pan")
Remove the baffle plate (A).

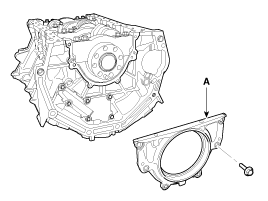
Remove the rear oil seal case (A).

Check the connecting rod end play.
(Refer to Cylinder Block - "Piston And Connecting Rod")
Check the connecting rod cap oil clearance.
(Refer to Cylinder Block - "Piston And Connecting Rod")
Remove the piston and connecting rod assemblies.
(Refer to Cylinder Block - "Piston and Connecting Rod")
Remove the crankshaft main bearing cap and check oil clearance.
Check the crankshaft end play.
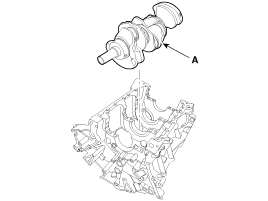
Remove the crankshaft.
Lift the crankshaft (A) out of engine, being careful not to damage journals.

Arrange the main bearings and thrust bearings in the correct order.