Coupling Maintenance Precautions
Maintain the coupling at a horizontal level.
Refer to the handling caution level (A) when servicing the coupling (removal, installation, replacement, etc.).
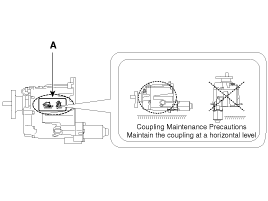
All units are filled up with coupling fluid (ultra-low viscosity ATF) prior to shipping. Inspection, fill-up, and replacement of coupling fluid is therefore not necessary (zero maintenance, lifetime fluid).
Coupling Maintenance Precautions
Maintain the coupling at a horizontal level.
Refer to the handling caution level (A) when servicing the coupling (removal, installation, replacement, etc.).

Remove the 4WD coupling assembly bolts (A-3ea) mounted to the rear propeller shaft (B).
Tightening torque :
49.0~68.6N.m (5.0~7.0kgf.m, 36.2~50.6lb-ft)
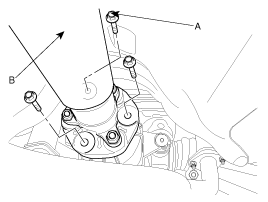
Using a flat tool, separate the propellar shaft from 4WD coupling assembly.
Disconnect the pressure sensor connector (A) and Oil hydraulic Motor connector (B).
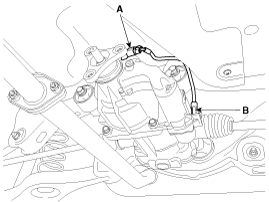
Loosen the coupling assembly mounting bolts (A-4ea).
Tightening torque :
58.8~63.7N.m (6.0~6.5kgf.m, 43.4~47.0lb-ft)
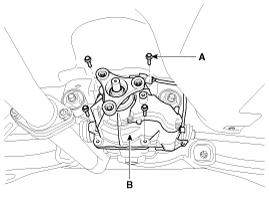
Using a flat tool, separate the 4WD coupling assembly from the rear differential carrier assembly.
Install in the reverse order of removal.
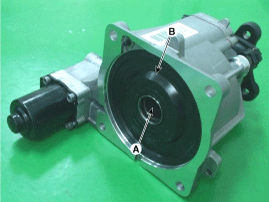
Smear the splines (A) with molybdenum type high pressure grease.
When install the coupling, be careful not to damage the oil seal (B).
After replacing the coupling, reset the 4WD ECU's clutch learing using the GDS tool.
(Refer to 4WD Control System - "Repair procedures")