4.
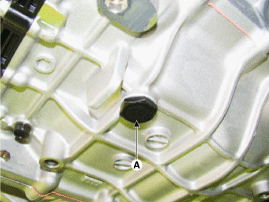
Remove the drain plug (A) and reinstall the drain plug after draining ATF totally.
Drain plug tightening torque :
38.2 ~ 48.1 N.m (3.9 ~ 4.9 kgf.m, 28.2 ~ 35.4 lb-ft)
caution
Replace the gasket before reinstalling the drain plug.
Remove the air duct.
(Refer to Engine Mechanical System - "Air cleaner")
Remove the battery and the battery tray.
(Refer to Engine Electrical System - "Battery")
Remove the under cover.
(Refer to Engine Mechanical System - "Engine Room Under Cover")
Remove the drain plug (A) and reinstall the drain plug after draining ATF totally.
Drain plug tightening torque :
38.2 ~ 48.1 N.m (3.9 ~ 4.9 kgf.m, 28.2 ~ 35.4 lb-ft)
Replace the gasket before reinstalling the drain plug.
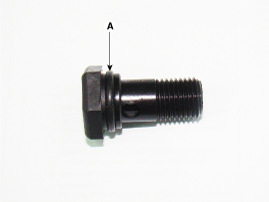
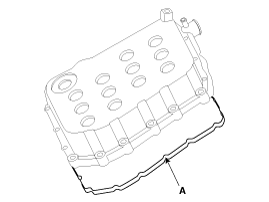
Remove the ATF Injection hole(eyebolt) (A).
Eyebolt tightening torque :
2.9 ~ 4.9 N.m (0.3 ~ 0.5 kgf.m, 2.2 ~ 3.6 lb-ft)
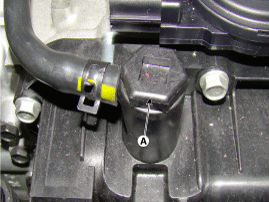
Replace the O-Ring (A) before reinstalling the eyebolt.
Remove the valve body cover (B).
Tightening torque :
(A) 13.7 ~ 15.7 N.m (1.4 ~ 1.6 kgf.m, 10.1 ~ 11.6 lb-ft)
Replace the gasket (A) before reinstalling the valve body cover.
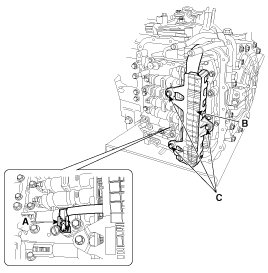
Remove the bolts (C) after disconnecting the solenoid valve connector (B) and the oil temperature sensor connector (A).
Tightening torque :
9.8 ~ 11.8 N.m (1.0 ~ 1.2 kgf.m, 7.2 ~ 8.7 lb-ft)
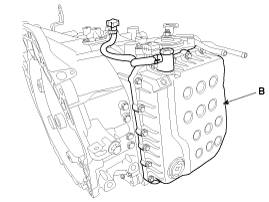
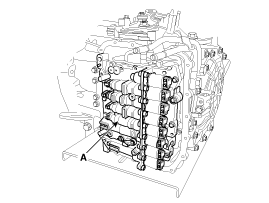
Remove the valve body assembly (A).
Tightening torque :
9.8 ~ 11.8 N.m (1.0 ~ 1.2 kgf.m, 7.2 ~ 8.7 lb-ft)
Install in the reverse order of removal.
Adding Automatic Transaxle Fluid(ATF).
(Refer to Hydraulic System - "Fluid")
Perform Transaxle Control Module(TCM) learning after replacing the valve body to prevent slow transaxle response, jerky acceleration and jerky startup.
(Refer to Automatic Transaxle Control System - "Repair procedures")
