6.
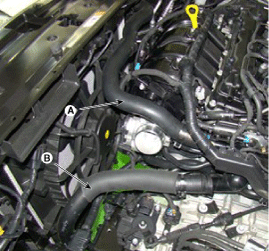
Remove the radiator upper hose(A) and lowr hose(B).
Disconnect the battery terminals.
Remove the air cleaner assembly.
(Refer to Intake And Exhaust System - "Air Cleaner")
Remove the under cover.
(Refer to Engine And Transaxle Assembly - "Engine Room Under Cover")
Loosen the drain plug, and drain the coolant.
Remove the radiator cap to speed draining.
Remove the front bumper cover.
(Refer to Body - "Front Bumper Cover")
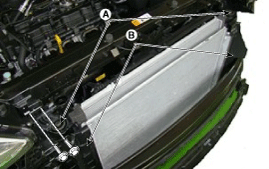
Remove the radiator upper hose(A) and lowr hose(B).
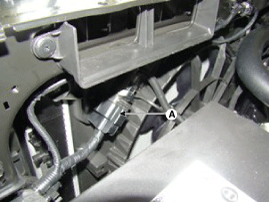
Disconnect the fan motor connector (A).
Remove the air intake shield(A).
Remove the upper air guard(A) and radiator over flow hose(B).
Remove the horn.
(Refer to Body Electrical System - "Horn")
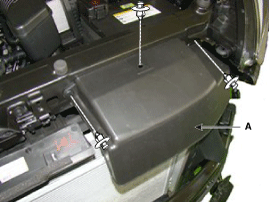
Remove the upper bracket(A) and air guard(B).
Tightening torque:
7.8 ~ 11.7 N.m (0.8 ~ 1.2 kgf.m, 5.7 ~ 8.6 lb-ft)
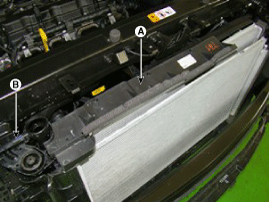
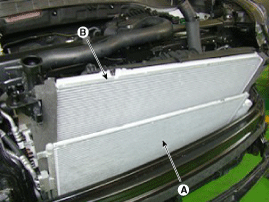
Separate the condenser(A) from the radiato(B)r and then remove the radiator assembly.
Install in the reverse order of removal.
Fill the radiator with coolant and check for leaks.
Bleed air from the cooling system.
Start engine and let it run until it warms up. (Until the radiator fan operates 3 or 4 times.)
Turn off engine. Check the coolant level and add coolant if needed. This will allow trapped air to be removed from the cooling system.
Put the radiator cap on tightly, then run engine again and check for leaks.
