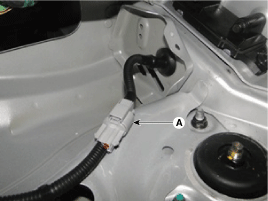
Disconnect the active hood actuator connector (A).
Turn ignition switch OFF and disconnect the negative (-) battery cable.
Remove the cowl top cover.
(Refer to Body - "cowl top cover")
Disconnect the active hood actuator connector (A).

Remove the plug located on the side of the hood hinge and pre-tighten the bolt (A).
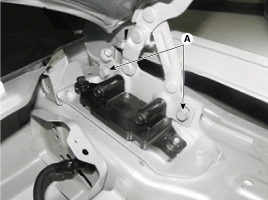
Loosen the bolt (A) and nut (B) on the upper side of the active hood actuator.
Tightening torque:
21.6 ~ 26.5 N.m (2.2 ~ 2.7 kgf.m, 16 ~ 19.5 lb-ft)
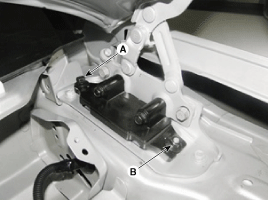
Loosen the bolt (A) on the side of the active hood actuator.
Tightening torque:
21.6 ~ 26.5 N.m (2.2 ~ 2.7 kgf.m, 16 ~ 19.5 lb-ft)
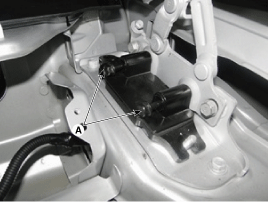
Separate the harness grommet (B) and remove the active hood actuator (A).
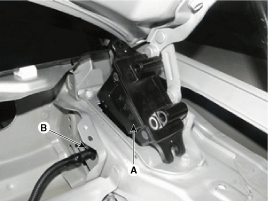
Becareful when handling the active hood actuator. An impact to the actuator may operate it and cause injury.
To recover the active hood actuator remove it from the vehicle.
To press in the active hood actuator use an cctive hood actuator recovery tool (09791-2W000).
Check how many times the actuator has activated with GDS and if it has been activated 3 times replace it.
Before pressing in the active hood actuator check the condition of the latch.
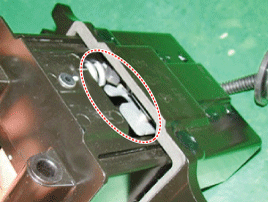
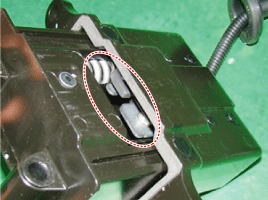
Place the active hood actuator recovery tool body (A) on a flat surface and then install the active hood actuator (B).
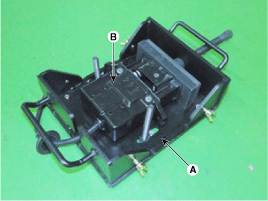
Install the blocks (A) and then push the adapter (B) in the direction of the arrow to come in contact with the actuator.
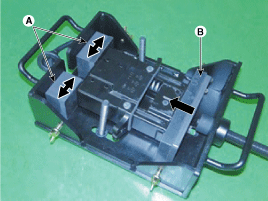
Adjust the block (A) left and right to support the actuator securly.
Put the rubber part of the mount adapter (A) face down and fix it with a washer and wing nut (B).
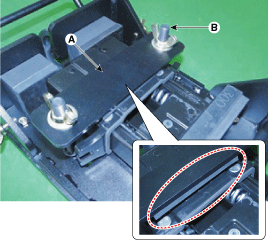
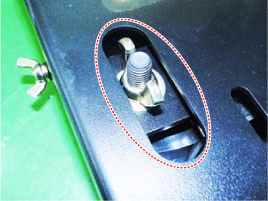
When tightening theh wing nut make sure it is tighten so that the cover can be installed.
Install the cover (A) and push it in the direction of the arrow and tighten the wing nuts (B: 4EA)
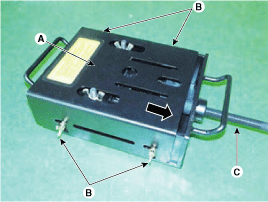
Tighten the tool shaft (C) and press the actuator.
Do not apply much force.
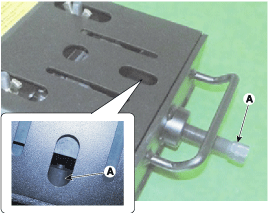
Press the actuator until it is fully pressed by checking the cover hole (A).
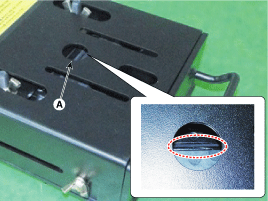
Check if the actuator can be reused.
Unscrew the wing nuts (A) and remove the cover.
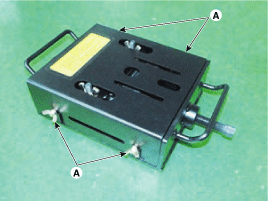
Install the rubber (A).
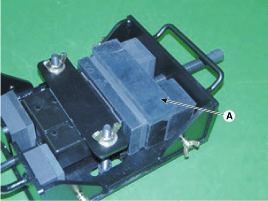
Install the cover (A) and push it in the direction of the arrow and tighten the wing nuts (B : 4 EA)
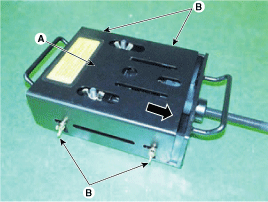
Loosen the shaft (A).
Connect the active hood actuator deployment adaptar (09791-2W100) and deployment tool (0957A-34100A) to the actuator connector.
Connect the deployment tool (0957A-34100A) to the vehicle battery.
Activate the deployment tool (0957A-34100A) switch in order and deploy the actuator.
When the actuator is deployed rubber noise will be heard.
Assure a safe distance (2 meters) when the actuator is deployed.
Separate the active hood actuator deployment adaptar (09791-2W100) and deployment tool (0957A-34100A).
Remove theh SST cover.
Remover the rubber (A) by tightening the SST shaft.

Check the condtion of the actuator latch by fully loosening the SST shaft.


Install the cover (A) and push it in the direction of the arrow and tighten the wing nuts (B : 4EA)

Press the actuator by tightening the tool shaft (C).
Do not apply much force.
Press the actuator until it is fully pressed by checking the cover hole (A).

Separate the active hood actuator deployment adaptar (09791-2W100) and deployment tool (0957A-34100A).
Loosen the shaft and remove the cover.
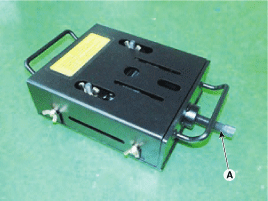
Loosen the wing nut and remove the mount adapter (A).
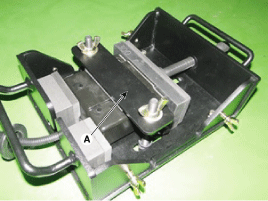
Remove the actuator from the active hood actuator recovery tool (09791-2W000).
Install in the reverse order of removal.
Check the warning notice and hood open warning light from the cluster.