2.
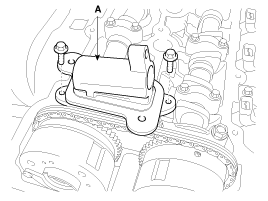
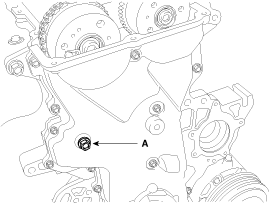
Remove the exhaust oil control valve (OCV) adapter (A).
Use fender covers to avoid damaging painted surfaces.
To avoid damage, unplug the wiring connectors carefully while holding the connector portion.
Mark all wiring and hoses to avoid misconnection.
Turn the crankshaft pulley so that the No. 1 piston is at top dead center (TDC).
Remove the cylinder head cover.
(Refer to Cylinder Head Assembly - "Cylinder Head Cover")
Remove the exhaust oil control valve (OCV) adapter (A).
Set No.1 cylinder to top dead center (TDC) on compression piston.
Turn the crankshaft pulley and align its groove with the timing mark of the timing chain cover.
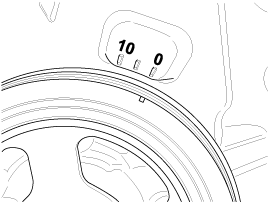
Do not rotate engine counterclockwise.
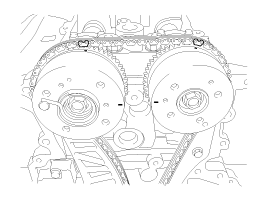
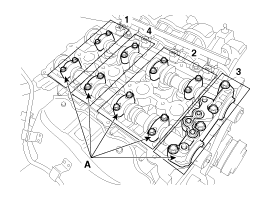
Check that the marks of the camshaft timing sprockets are in straight line on the cylinder head surface as shown in the illustration. If not, turn the crankshaft one revolution (360°).
Put paint marks on the timing chain links (2 places) that meet with the timing marks of the intake, exhaust countinuous variavle valve timing (CVVT) sprockets.
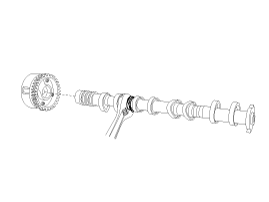
Remove the camshaft bearing caps (A) with the order below.
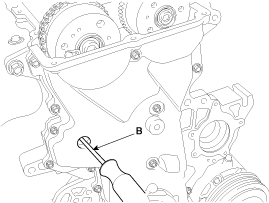
Remove the service hole bolt (A) of the timing chain cover.
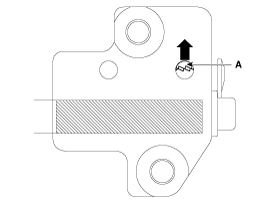
Release the ratchet (A) of the timing chain tensioner by pushing and holding the ratchet upward using a thin rod (B).
Remove the exhaust camshaft first, and then remove the intake camshaft from the timing chain.
When disconnecting the timing chain from the camshaft timing sprocket, hold the timing chain.
Tie a timing chain with a string.
Be careful not to drop anything inside timing chain cover.
Remove the Intake CVVT assembly (A) and exhaust camshaft sprocket (B).

When removing the intake CVVT assembly bolt and exhaust CVVT assembly bolt, prevent the camshaft from rotating by using a wrench at position.