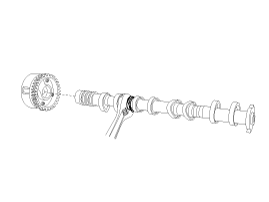
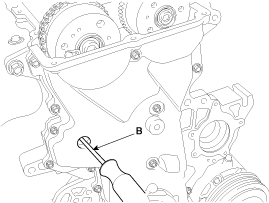
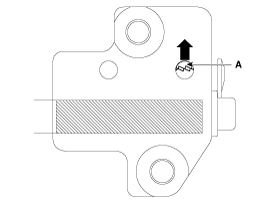
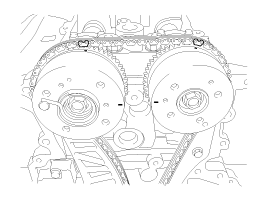
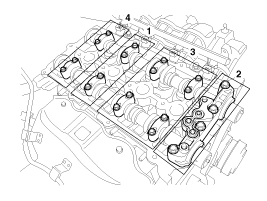
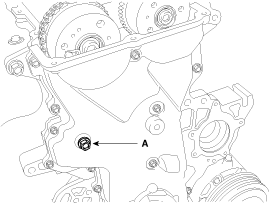
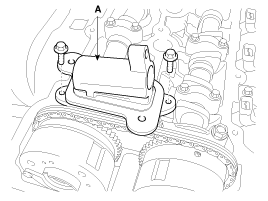
Installation
1.

Install the intake CVVT assembly (A) and exhaust CVVT assembly (B).

Tightening torque :

63.7 ~ 73.5 N.m (6.5 ~ 7.5 kgf.m, 47.0 ~ 54.2 lb-ft)

note

When installing the intake CVVT assembly bolt and exhaust CVVT assembly bolt, prevent the camshaft from rotating by using a wrench at position.

2.

Untie a timing chain with a string.

caution

Be careful not to drop anything inside timing chain cover.

3.

Release the ratchet (A) of the timing chain tensioner by pushing and holding the ratchet upward using a thin rod (B).

4.

Install the intake camshaft first, and then install the exhasut camshaft to the timing chain.

(1)

Hold the timing chain, and place the intake camshaft and CVVT module assembly.

(2)

Align the matchmarks on the timing chain and camshaft timing CVVT sprocket.

(3)

Install the exhaust camshaft and CVVT module assembly.

note

The timing marks of each CVVT sprocket should be matched with timing marks (painted link) of timing chain when installing the timing chain.

5.

Install the camshaft bearing caps with the order below.

Tightening torque

M6 bolts :

11.8 ~ 13.7 N.m (1.2 ~ 1.4 kgf.m, 8.7 ~ 10.1 lb-ft)

M8 bolts :

18.6 ~ 22.6 N.m (1.9 ~ 2.3 kgf.m, 13.7 ~ 16.6 lb-ft)

note

Be careful not to change the position and direction of bearing caps.

6.

Pull out a thin rod from the service hole of the timing chain cover after tensing up the ratchet.

7.

Install the service hole bolt of the timing chain cover.

Tightening torque :

27.5 ~ 30.4 N.m (2.8 ~ 3.1 kgf.m, 20.3 ~ 22.4 lb-ft)

caution

The bolt must not be reused once it has been assembled.

8.

Turn the crankshaft two turns in the operating direction(clockwise) and realign crankshaft sprocket and camshaft CVVT sprocket timing marks.

9.

Install the exhaust oil control valve (OCV) adapter (A).

Tightening torque :

9.8 ~ 11.8 N.m (1.0 ~ 1.2 kgf.m, 7.2 ~ 8.7 lb-ft)

10.

Install the cylinder head cover.

(Refer to Cylinder Head Assembly - "Cylinder Head Cover")

Яндекс.Метрика