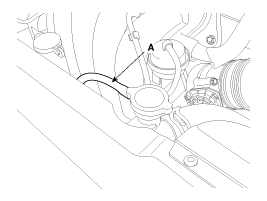
Disconnect the over flow hose (A) from the filler neck.
Disconnect the battery "-" terminal.
Remove the air duct and air cleaner assembly.
(Refer to Intake And Exhaust System - "Air Cleaner)
Disconnect the over flow hose (A) from the filler neck.

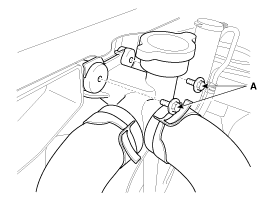
Loosen the filler neck assembly mounting bolts (A).
Tightening torque :
6.9 ~ 10.8 N.m (0.7 ~ 1.1 kgf.m, 5.1 ~ 8.0 lb-ft)
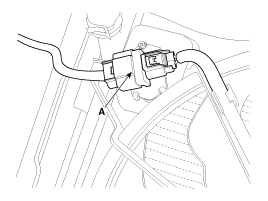
Disconnect the fan motor connector (A).
Loosen the variable Intake solenoid (VIS) actuator mounting bolts (A).
Tightening torque :
9.8 ~ 11.8 N.m (1.0 ~ 1.2 kgf.m, 7.2 ~ 8.7 lb-ft)
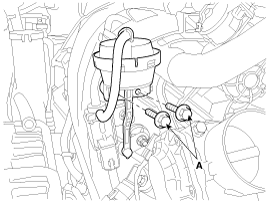
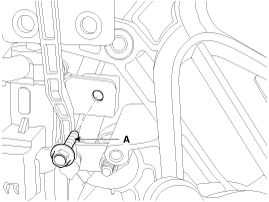
Detach the variable intake solenoid (VIS) valve & bracket after unfastening the mounting bolt (A).
Tightening torque :
9.8 ~ 11.8 N.m (1.0 ~ 1.2 kgf.m, 7.2 ~ 8.7 lb-ft)
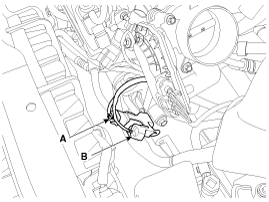
Disconnect the crankshaft position sensor (CKPS) connector (A) and the front connector (B).
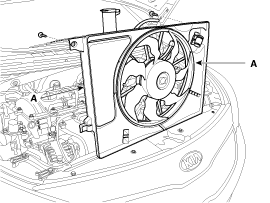
Remove the cooling fan (A).
Tightening torque:
4.9 ~ 7.8 N.m (0.5 ~ 0.8 kgf.m, 3.6 ~ 5.8 lb-ft)
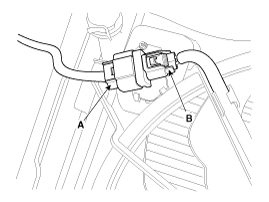
Disconnect the wire harness connector (A) and the fan motor connector (B).
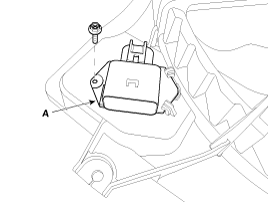
Remove the resistor (A) from the cooling fan shroud.
Tightening torque :
1.8 ~ 2.5 N.m (0.18 ~ 0.25 kgf.m, 1.3 ~ 1.8 lb-ft)
Install in the reverse order of removal.