1.
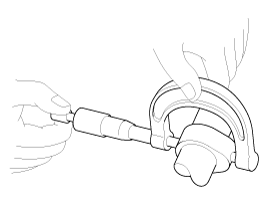
Measure the height of the cam lobe using a micrometer and check the surface of the cam lob for wear and tear. If necessary, replace the camshaft.
Cam height
Intake : 44.15 mm (1.738 in.)
Exhaust : 43.55 mm (1.715 in.)
Measure the height of the cam lobe using a micrometer and check the surface of the cam lob for wear and tear. If necessary, replace the camshaft.
Cam height
Intake : 44.15 mm (1.738 in.)
Exhaust : 43.55 mm (1.715 in.)
Check the surface of the camshaft journal for wear and tear. If the camshaft journal is excessively damaged, replace the camshaft.
Inspect the camshaft journal clearance.
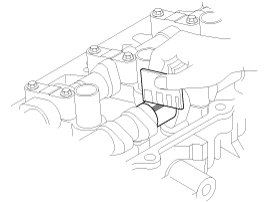
Clean the camshaft journals and bearing caps.
Place the camshafts in the cylinder head.
Lay a strip of plastigauge across each of the camshaft journals.

Install the bearing caps and tighten the bolts to the specified torque.
Tightening torque
1st step
M6 bolt : 5.9 N.m (0.6 kgf.m, 4.3 lb-ft)
M8 bolt : 9.8 N.m (1.0 kgf.m, 7.2 lb-ft)
2nd step
M6 bolts :
11.8 ~ 13.7N.m (1.2 ~ 1.4kgf.m, 8.7 ~ 10.1lb-ft)
M8 bolts :
18.6 ~ 22.6N.m (1.9 ~ 2.3kgf.m, 13.7 ~ 16.6lb-ft)
Do not turn the camshaft.
Remove the bearing caps.
Measure the plastigauge at the widest point. If the clearance is greater than the specification, replace the camshaft. If necessary, replace the bearing caps and the cylinder head as a set.
Camshaft bearing cap oil clearance
Standard :
0.027 ~ 0.058 mm (0.0011 ~ 0.0023 in.)
Limit : 0.1 mm (0.0039 in.)
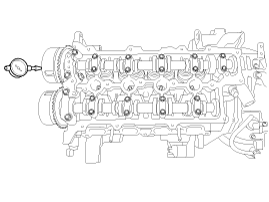
Inspect the camshaft end play.
Inspect the camshaft end play.
Measure the end play while moving the camshaft back and forth using a dial gauge. If the end play is greater than the specification, replace the camshaft. If necessary, replace the bearing caps and the cylinder head as a set.
Camshaft end play
Standard : 0.1 ~ 0.2 mm (0.0039 ~ 0.0079 in.)
Remove the camshafts.
Inspect the CVVT for smooth rotation.
Clamp the camshaft using a vise. Be careful not to damage the cam lobes and journals in the vise.
Check that the CVVT is locked by turning it clockwise or counterclockwise. It must not rotate.
Intake CVVT : Seal one of the two advance holes in the camshaft journal with tape.
Exhaust CVVT : Seal one of the two retard holes in the camshaft journal with tape.
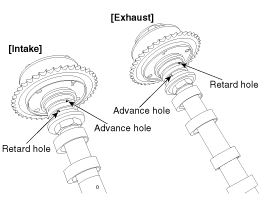
Intake CVVT : Apply approx. 150 kPa (1.5 kgf/㎠, 21 psi ) of compressed air into the unsealed advance hole to release the lock.
Exhaust CVVT : Apply approx. 150 kPa (1.5 kgf/㎠, 21 psi ) of compressed air into the unsealed retard hole to release the lock.
Cover the oil paths with a piece of cloth when applying compressed air to prevent oil from spraying.
Intake CVVT : With compressed air applied, rotate the CVVT into the advance direction (counterclockwise) within its phasing range and check that the CVVT turns smoothly.
Exhaust CVVT : With compressed air applied, rotate the CVVT into the retard direction (clockwise) and check that the CVVT turns smoothly.
CVVT phasing range
Intake : 25˚±1˚ (from the most retarded position to the most advanced position)
Exhaust : 20˚±1˚ (from the most advanced position to the most retarded position)
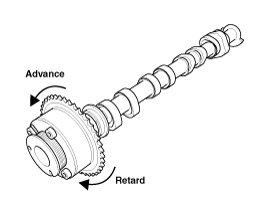
Intake CVVT : Rotate the CVVT into the most retarded position (clockwise) and then check that the CVVT is locked.
Exhaust CVVT : Rotate the CVVT into the most advanced position (counterclockwise) and then check that the CVVT is locked.
