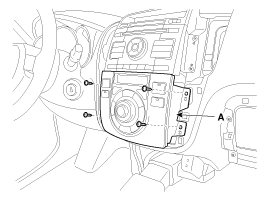
After removing the screws, remove the heater control module (A).
Disconnect the negative (-) battery terminal.
Remove the air vent.
(Refer to the BD group - "Crash pad")
After removing the screws, remove the heater control module (A).

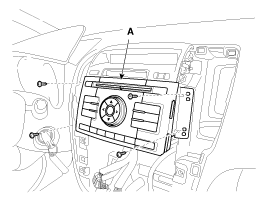
Remove the audio assembly (A) after loosening the mounting screws (4EA).
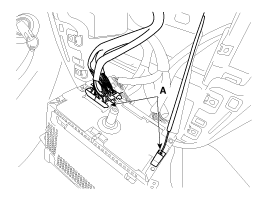
Disconnect the audio connectors and cable (A), then remove the audio unit.
If CD does not eject, don't try removing it.
The player may be damaged.
Therefore, contact a service shop for repairs.
Do not work in a dusty or dirty place.
Do not touch the circuit board with your bare hands.
Do not touch the terminal connector of the flat plate cable with your bare hands. (If you have touched it, wipe it off thoroughly)
If necessary of disassembling CD-rom drive, refer to the following procedures.
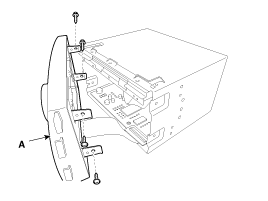
When separating the CD rom drive, if necessary, remove the screws (4EA) on the head unit and then disassemble the front cover (A).
Remove the top cover (A) after removing screws and disconnecting the film connector (B).
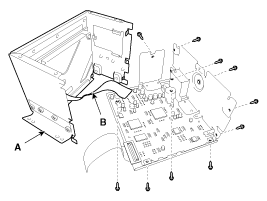
Take care not to damage the film connector.
After loosening the screws (4EA), remove the CD rom drive (A).
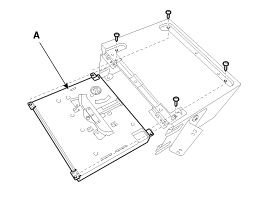
Reassemble the CD-rom drive to the audio unit.
Reconnect the film connector between the drive and audio head unit.
Reassemble the front cover.
Make sure the film connector and cable jack are plugged in properly.
Connect the audio unit connectors and cable.
Install the audio unit.
Install the heater control module.
Install the air vent.
Connect the negative (-) battery terminal.
Make sure the audio head unit connectors are plugged in properly and the antenna cable is connected properly.
Check the audio system.