4.
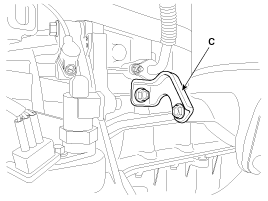
Remove the heat protector (C) after removing 3 bolts. [LHD only]
Tightening torque :
14.7 ~ 19.6N.m (1.5 ~ 2.0kgf.m, 10.8 ~ 14.5lb-ft)
Must check damage of the DPF assembly before removing the DPF assembly.
Remove the exhaust pipe of the DPF end side. Check damage or decoloration(white) of the rear section of the DPF.
Check existence of the soot of the rear section of the DPF. DPS assembly has some trouble if you find black soot.
Turn ignition switch OFF and disconnect the negative (-) battery cable.
Remove the cowl top cover. (Refer to "Exterior" in BD group.)
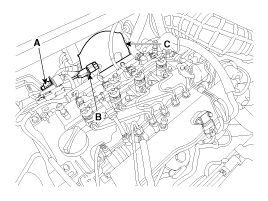
Disconnect the exhaust gas temperature sensor #1 connector (A) and the #2 connector (B).
Remove the heat protector (C) after removing 3 bolts. [LHD only]
Tightening torque :
14.7 ~ 19.6N.m (1.5 ~ 2.0kgf.m, 10.8 ~ 14.5lb-ft)
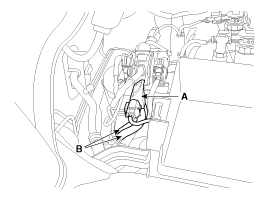
Disconnect the differential pressure sensor connector (A).
Disconnect the hoses (B) connected with the differential pressure sensor from the DPF assembly.
Remove the front muffler.
(Refer to Intake Exhaust System - "Muffler")
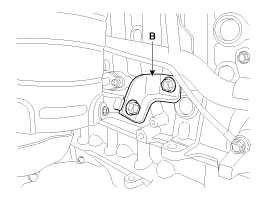
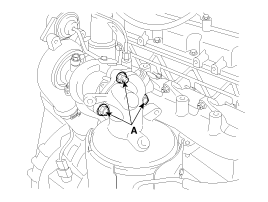
Remove the DPF assembly brackets (A, B, C).
Tightening torque :
39.2 ~ 49.1N.m (4.0 ~ 5.0kgf.m, 28.9 ~ 36.2lb-ft)
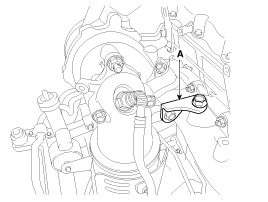
Remove the DPF assembly installation bolts/nut (A).
Tightening torque :
39.2 ~ 49.0N.m (4.0 ~ 5.0kgf.m, 28.9 ~ 36.2lb-ft)
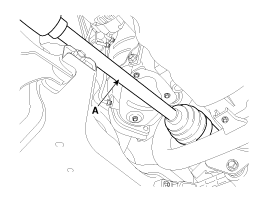
Remove the right driveshaft (A) for securing theworking space. (Refer to "Driveshaft Assembly" in DS group.) [RHD Only]
Remove the CPF assembly by lifting it up. [LHD]
Remove the CPF assembly by taking it down. [RHD]
